Eyebrow Waxing at Home A Beginner’s Guide: Like everyone here, you want flawless eyebrows whenever. Properly formed and groomed brows frame and define your face. Getting the perfect brows can be difficult if you don’t have time or money to attend the salon.
Though we always advocate visiting to the pros, it’s reasonable that you might want to wax eyebrows yourself to maintain them looking their best without the extra trip. Thoughts? “I already see my favourite esthetician.
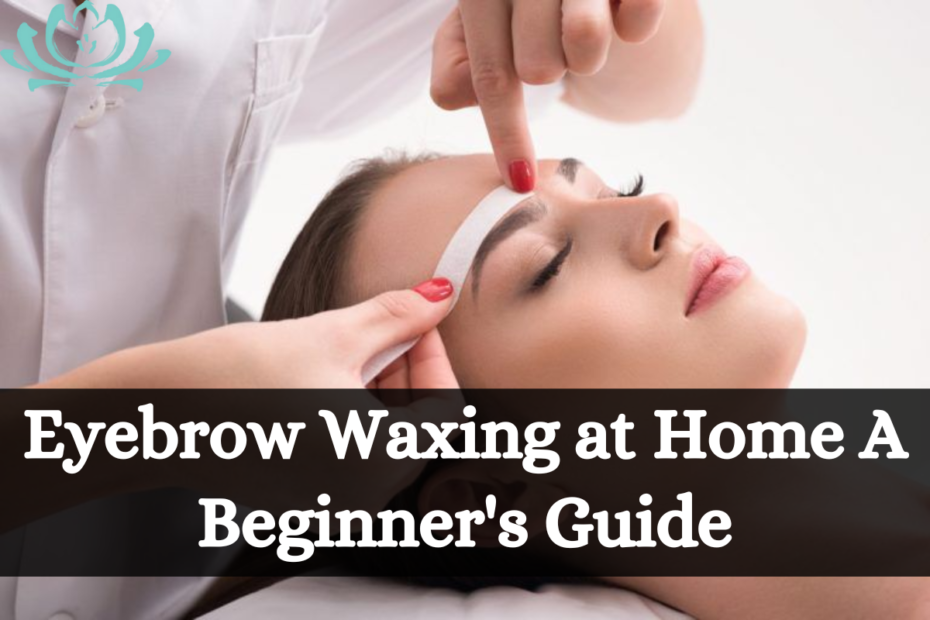
Eyebrow Waxing at Home A Beginner’s Guide

We know you enjoy a few minutes of relaxation and having someone else shape your brows, so why learn how to wax them yourself? If you wish to wax your eyebrows step-by-step, this backup skill can help. With that in mind, we’ve created a comprehensive post to help you with eyebrow waxing and recommend the best tools.
Waxing eyebrows at home
- Only experienced waxers should wax eyebrows at home. First-timers should consult a professional to see how it works.
- Start by trying the method without hair removal after obtaining a feel for it.
- To ensure proper brow placement and a uniform wax shape for your face, measure your brows. Apply wax outside the drawn border after choosing a form.
- It’s okay to use a tweezers to catch stray hairs after waxing.
What’s the best way to wax eyebrows for beginners?
Six elements are essential for basic eyebrow waxing:
- Cleansing
- Measure brows
- Trim, wax, tweeze Post-care
- Be sure to have all the tools you need at home before starting. Nobody wants to run out of wax strips after waxing.
We can assist you avoid such little calamities. So here’s our list of starter items:Want these high-quality brow grooming products? We have the best eyebrow wax for you.

Eyebrow waxing kit
- You’ll find a best waxing kits on google. You may find everything you need for eyebrow waxing there. The package is for waxing eyebrows, lips, or facial hair.
- The 4.5 and 6 in wooden wax applicators, a pre- and post-wax care bundle (with three options), a hard wax warmer, and your choice of hard wax (pink, blue, or black beads, blue film tablets, or our ultra-sensitive Star soft tablets) are included.
- This kit finished 5 of your 10 needed items! If utilising hard wax, only nine components are needed—no wax strips. If you’re only using it for brows, it will last a long time.
Also See:
Pain Management Massage: A Step-by-Step Guide
Process of waxing eyebrow

Step 1: Start by heating wax.
- Give your wax time to warm up in the warmer, whether it’s soft or hard.
- To achieve a honey-thick texture, lower your warmer’s temperature after melting the wax.
Step 2: Cleansing
- Wash your face of makeup and oils as your wax warms. Too much makeup or particles might prevent wax from adhering to hair. A smooth, clean surface works best.
- Your kit’s pre-wax gel will be used now. Use a cotton pad to apply gel to your brows, skin between and around them, and anywhere you’ll wax.
- This procedure gives your skin an extra cleanse to ensure a good wax and prevent irritation and post-wax pimples.
Step 3: trim your brows
- Brush your brow hairs upward with your spool. For a regular length, clip longer hairs with scissors.
- Trim one little section of hair.
- Avoid cutting all your hair at once to avoid blotchy or spotty trimming! You can do each hair individually.
Step 4: Brow Measurement
- We promise it will get simpler with practice, measuring and defining your brows!
- This technique, “The Golden Ratio,” helps shape brows to your facial features. One of your wooden applicators should align with the centre of your nostril and go straight up to your brow.
- Start your brow hairs here. Use your brow pencil to mark this line to determine how much hair to wax or not wax.
- Find our brow stop next. Move the wooden applicator from your eye corner to your brow using the same landmark at the centre of your nostril. Tail should finish here.
- Finally, to determine your arch, place the applicator in the same nostril beginning point and across the middle of your iris when gazing straight ahead. The applicator touches the brow, creating an arch.
Step 5: Wax
- First, put a tiny amount of wax under your eyebrow in the planned location. Starting sparsely until you’re comfortable is best because you can’t add hair.
- Use soft or hard wax in the direction of hair growth and pull it off in the other direction.
Step 6: Tweezers and Touch Up
- Use tweezers to remove any stray hairs after waxing the bottom, in between, and above your brows.
- To maintain consistency, pluck one hair at a time and compare the shape and evenness of your brow to the other side after practically every pluck.
Step 7: Apply Post-Care Waxing Lotion/Gel/Oil
- For cleansing and soothing, apply your post-wax package product on a clean cotton swab to the waxed regions.
- You’re done! Your step-by-step eyebrow waxing instruction is no longer daunting, and we hope you have the confidence to attempt it.
If you like this Article about Eyebrow Waxing at Home A Beginner’s Guide please share this Article with your friends and family members.